How to Apply Window Film Without Bubbles
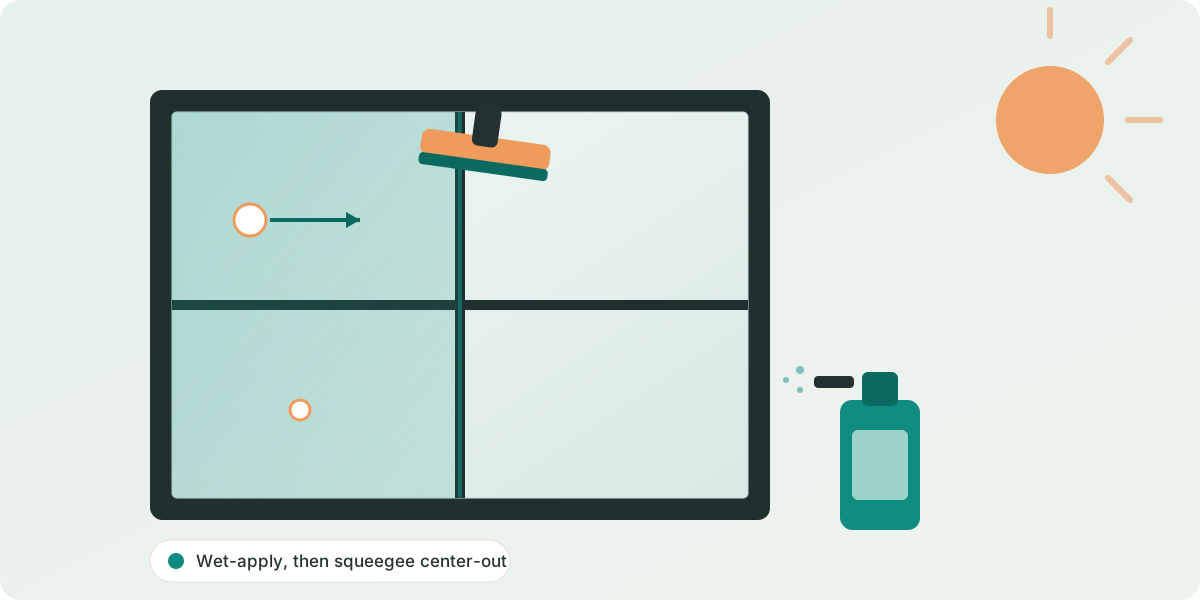
▲ Illustration — wet-apply the film, then squeegee from the center outward to push out air and water.
Bubble-free window film comes down to a spotless smooth pane, a wet application, and squeegeeing from the center outward. Clean and dry the glass, spray both the glass and the film's adhesive with a slip solution (water plus a little dish soap), position the film while it's wet, set a centerline, then squeegee firmly to each edge. Work air pockets out now — they won't self-heal — while small water pockets are normal and dry out as the film cures over days to a few weeks.
Guidance is compiled from manufacturer installation guides and FAQs and cited in Sources. Some links may be affiliate links (policy).
Step-by-step: a bubble-free application
The wet-application method below is what manufacturers describe for standard flat-glass film — both adhesive and static-cling films go on wet so you can slide, position, and squeegee the water out.
Clean the glass until it's spotless, then let it dry
Any dust, lint or grit trapped under the film shows up as a permanent bump that looks like a bubble. Clean the glass thoroughly with a lint-free cloth and make sure it's a smooth, flat pane — window film is made for clean, smooth glass, not textured or frosted surfaces.[1][2]
Wet both the glass and the film with a slip solution
Spray the glass and the film's adhesive side generously so the film can slide and so you can squeegee the water back out. A few drops of dish soap in water is the common DIY slip solution; Madico dilutes its own application concentrate 30 parts water to 1 — a product-specific ratio, not a dish-soap recipe.[3][4]
Set a centerline, then squeegee from the center outward
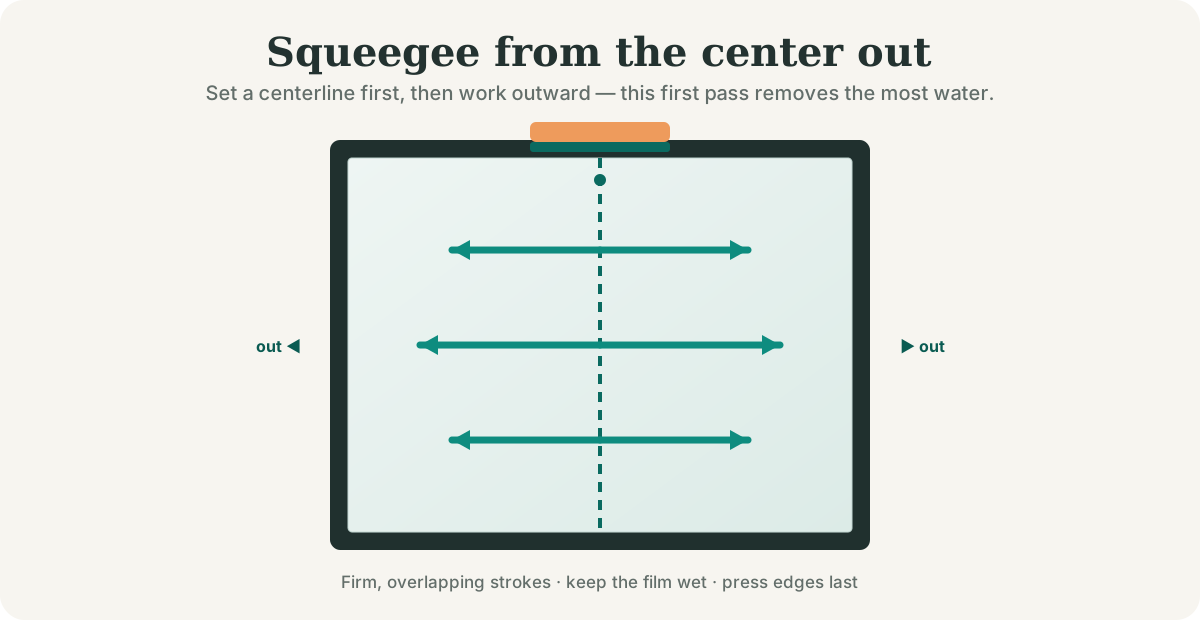
This is the technique every brand agrees on: press one firm pass top-to-bottom down the center to set the film, then squeegee outward to each side in firm, overlapping downward strokes. This first pass removes the most water and matters most.[2][3][1]
Work every air bubble out to the nearest edge — now
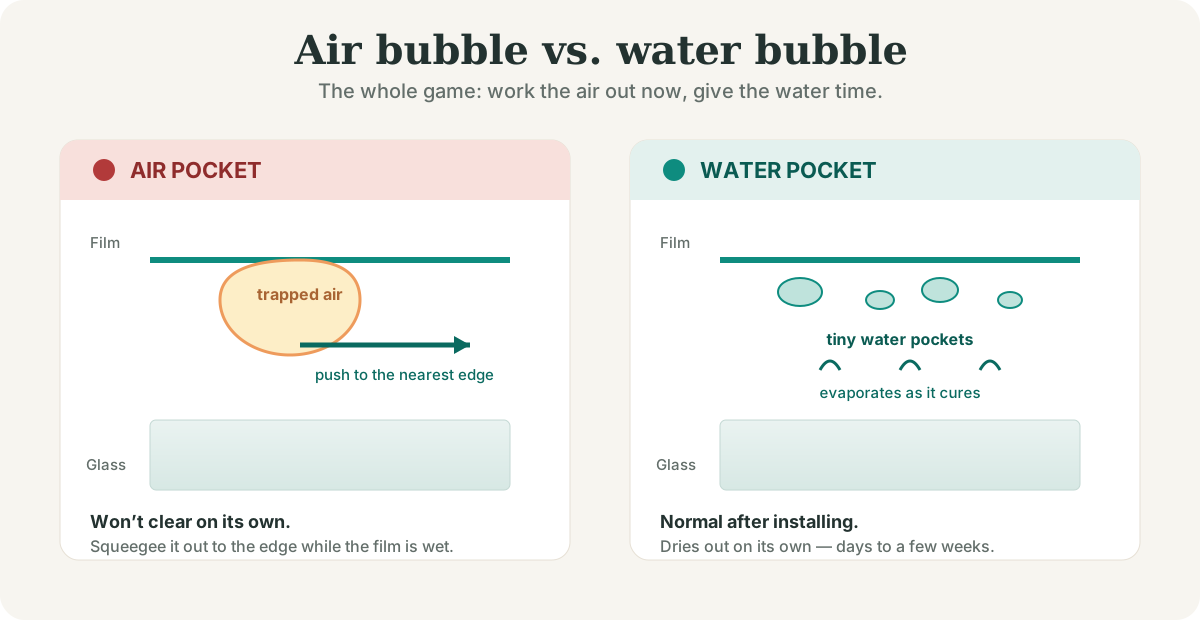
Air pockets will not disappear on their own, so push them to the closest edge with the squeegee while the film is still wet. (Small water pockets are a different thing — see below.)[1]
Water haze is normal — how long it takes to clear (and why brands differ)
After a good install you'll often see a light haze or scattered small water pockets. That's residual moisture, and it clears on its own — but there is no single universal timeline, and the manufacturers genuinely disagree because it depends on film thickness, film type, and the weather:
| Source | What they say about drying / curing |
|---|---|
| Gila | Small water bubbles "dry out in a few days"; the film fully cures in about 7–10 days.[1] |
| 3M | Thicker or metallic films can stay hazy and "may take several weeks to dry"; do the final inspection about 30 days after installing, and don't wash the window for 30 days.[2] |
| Madico | No fixed number — drying is weather-dependent: warm and sunny is faster, cold/cloudy/rainy is slower.[3] |
So the honest answer is a range, not a date: thin decorative or privacy films can clear in days; thick solar-control or metallic films can take several weeks; and cold, damp weather stretches any of them out. If the haze is water, waiting is the fix. If it's a trapped air pocket, it won't clear — re-wet and work it to an edge, or lift and re-lay that section.
About the "soap-and-water ratio"
You'll see specific recipes online — "one teaspoon of dish soap per quart," and so on. We're leaving those out on purpose: no manufacturer instruction sheet we reviewed publishes a household dish-soap ratio. The only numeric dilution we found is Madico's, and it's for its own application concentrate (30:1), not generic dish soap.[3] The practical rule the brands do agree on is simpler — use enough solution to keep the glass and film fully wet so the film slides and the squeegee can push the water out. Too little solution is what traps water and air in the first place.
Not sure film will even stick to your glass?
Check your glass type, film type and goal before you buy — textured, Low-E and double-pane glass all have rules.
Static cling vs. adhesive: same wet method, one difference
Both film types are applied wet and squeegeed the same way. The practical difference is recovery: a mispositioned or bubbled static-cling film can usually be peeled off, re-wet and re-laid, while an adhesive film that has bonded generally can't be reused — so on adhesive film it pays to get the position and the first squeegee pass right.[1]
Tools & supplies
Manufacturers describe a short kit: a spray bottle with a slip solution (water plus a little dish soap), a squeegee or hard smoothing card, a lint-free cloth or paper towels, and a sharp utility knife for trimming edges.
- Squeegee / hard smoothing card
- Spray bottle + slip solution
- Lint-free microfiber cloths
- Sharp utility knife for trimming
Affiliate disclosure: HowToApplyNow may earn a commission from qualifying purchases made through links on this page, at no additional cost to you. Products are added only after we vet the program and the terms — and only when a specific product's own instructions support their use for this task.
FAQ
Why does my window film have bubbles?
There are two causes. Trapped air pockets come from not squeegeeing the film out fully while it was wet, and they won't disappear on their own. Small cloudy water pockets are leftover slip solution — those are normal right after installing and dry out as the film cures.
Will window film bubbles go away on their own?
Water bubbles usually do — they clear as the moisture dries, anywhere from a few days to a few weeks depending on the film's thickness and the weather. Air bubbles will not; you have to re-wet and squeegee them out to the nearest edge, or lift and re-lay that section.
How long does window film take to dry and clear up?
It depends on the film and the weather, and brands differ: Gila says small water bubbles dry in a few days and the film cures in about 7–10 days, while 3M says thicker or metallic films can take several weeks and advises a final check at about 30 days. Warm, sunny weather speeds it up; cold, damp weather slows it down.
What soap-and-water mixture should I use to apply window film?
Use enough water with a little dish soap to keep the glass and film fully wet so the film slides and the squeegee can push the water out. No manufacturer publishes a universal dish-soap ratio — the only numeric dilution we found is Madico's 30:1, and that's for its own application concentrate, not household dish soap.
Should I pop window film bubbles with a pin?
Work bubbles to the nearest edge with a squeegee while the film is still wet first — that's what the manufacturer instructions describe. Pricking a bubble with a pin is a last-resort fix, not a standard step, and it leaves a hole in the film.
Sources
Research-first: manufacturer installation instructions, technical bulletins and FAQs. Common online tips with no manufacturer backing — a specific teaspoon-per-quart soap ratio, using a hair dryer to shrink bubbles, pin-pricking as a first step — are deliberately omitted or flagged as last-resort.
- Gila — Home window film FAQ & decorative/heat-control installation instructions (water bubbles vs. air bubbles; center-out squeegee pattern; ~7–10 day cure; apply to clean smooth glass; static cling can be re-laid). gilafilms.com
- 3M — Window film technical bulletins — flat-glass installation and care & cleaning (first squeegee pass is most critical; thick/metallic films may take several weeks; ~30-day final inspection; no washing for 30 days). 3m.com
- Madico — Exterior film installation & care instructions (application concentrate diluted 30:1 water-to-solution; center-out squeegee pattern; drying is weather-dependent with no fixed day count). madico.com
- Artscape — Window film application instructions (add soap to warm water; squeegee outward from the center to move out air and water; rub remaining bubbles to the nearest edge). artscape-inc.com
- LLumar — Architectural window film FAQs (curing/drying time varies with weather, glass type and product). llumar.com
Where brands split on drying/cure time (Gila ~7–10 days vs. 3M several weeks / 30-day check vs. Madico weather-dependent), the range is shown and tied to film thickness, film type and weather — not resolved into one false number. Sources last reviewed: August 2026.