How to Cut Peel-and-Stick Tile Around Outlets
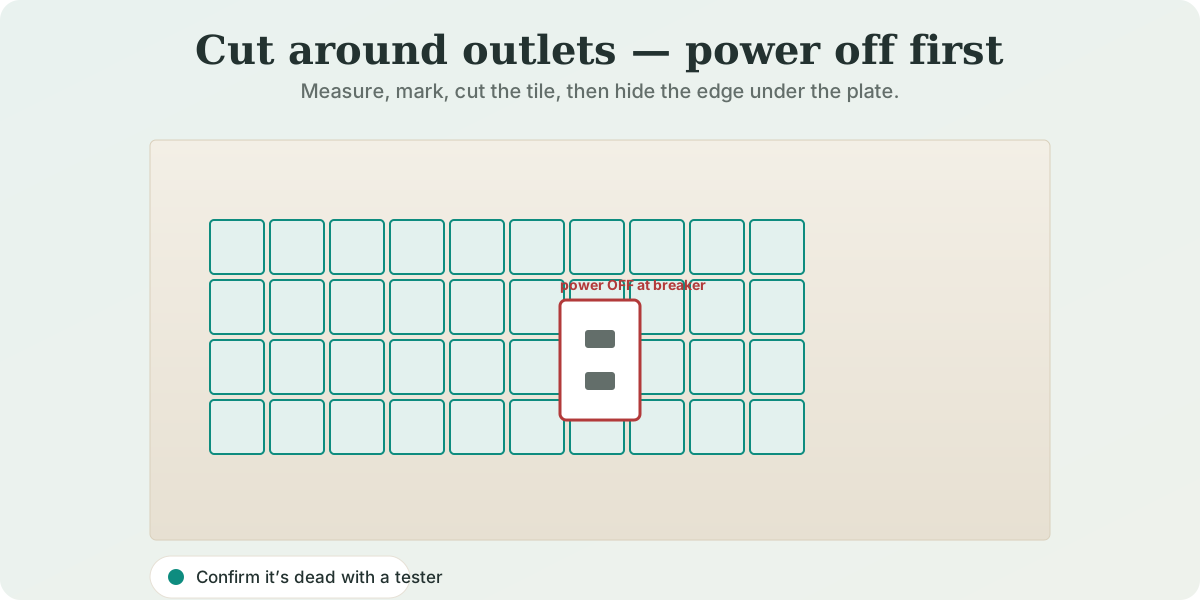
▲ Illustration — a tile scored around an outlet cutout with the cover plate off.
Turn off the power at the breaker and confirm it's dead, remove the cover plate, then measure the opening and cut it in the tile with a sharp utility knife and straightedge (tin snips for metal tile). Stick the tile up to the box so the reinstalled plate hides the cut edge. Because the tile adds thickness, bring the outlet flush with spacers — or fit a listed box extender if the box ends up recessed beyond code. If in doubt, call a licensed electrician.
Tiling steps are from manufacturer guides; the electrical-safety points are from reputable secondary/code sources, labeled in Sources. Electrical work carries risk — if you're unsure, hire a licensed electrician.
Step-by-step
Remove the cover plate
Unscrew and take off the outlet's cover plate so you can tile up to the box.[1]
Measure the opening and mark the cutout on the tile
Measure the outlet's width, height and distance from your reference edge, then transfer those dimensions and draw the cutout on the tile — on the back to hide the pencil lines, or on the face to align by eye.[3]
Cut with the right tool for the tile
For vinyl tile, score along the lines with a sharp utility knife against a straightedge and remove the center piece. For metal tile, use tin snips (or a Dremel with a metal-cutting wheel).[2]
Dry-fit before you peel the backing
Hold the cut tile in place to check the opening lines up around the box before removing the adhesive backing.[3]
Stick the tile so the cover plate will hide the edge
Peel, position and press the tile up to the box. Trim so the reinstalled cover plate fully covers the cut edge for a clean finish.[1]
Bring the outlet flush, then reattach the plate
Because the tile added thickness, the outlet now sits recessed. Add outlet spacers behind the device screws, or a listed box extender if the box is set back too far (see the safety note), then screw the receptacle out flush and reattach the plate.[1][4]
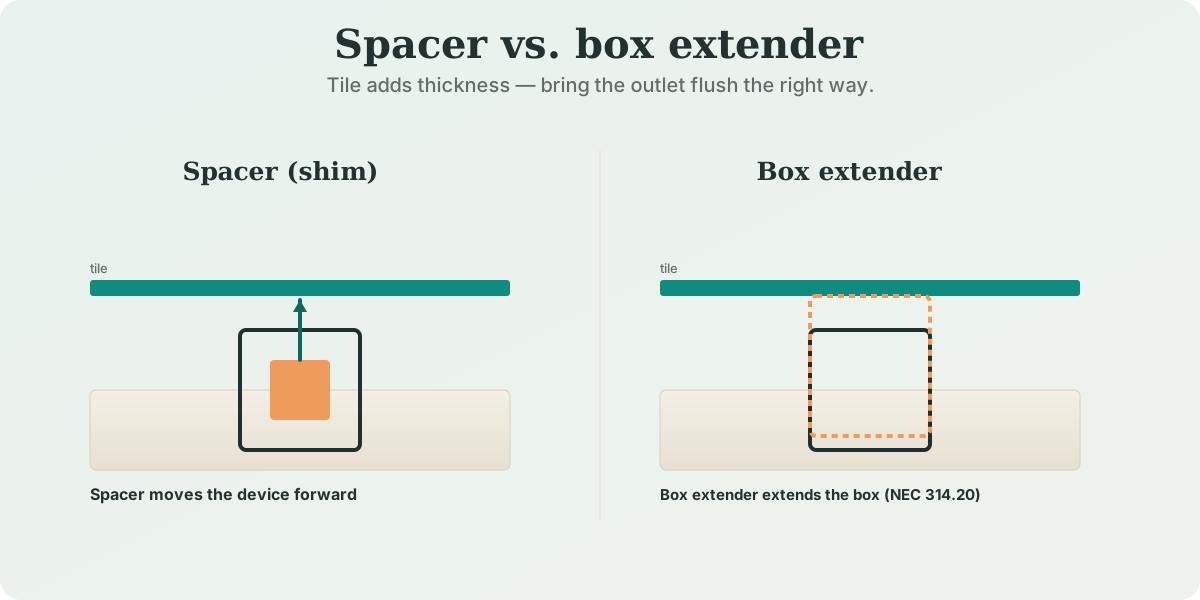
The part most guides skip: spacers vs. box extenders
Adding a backsplash pushes the finished wall surface forward and leaves the electrical box recessed — and how far back the box may sit is governed by code, not preference. Under NEC 314.20, on a non-combustible finish like tile or drywall the box front may be "set back no more than ¼ inch (6 mm)" from the surface; on a combustible finish (wood, plywood) the box must be flush or project out.[5]
Two different fixes are often confused:
- Outlet spacers (shims) — small stacking washers behind the device's mounting screws that push the receptacle forward so it sits flush with the new plate. This is the "spacer" Smart Tiles mentions.[1] They move the device, not the box.
- A listed box extender — a collar that extends the box opening out to the new surface so the box edge meets the ¼-inch (or flush) rule. This is what you need when the tile leaves the box recessed beyond code.[4]
Tools you may need
A utility knife and straightedge (or tin snips for metal), a tape measure and pencil, a non-contact voltage tester, and — if the tile is thick enough to recess the box — outlet spacers or a listed box extender.
- Non-contact voltage tester
- Sharp utility knife + straightedge
- Outlet spacers (shims)
- Listed box extender (if needed)
Affiliate disclosure: HowToApplyNow may earn a commission from qualifying purchases made through links on this page, at no additional cost to you. Products are added only after we vet the program and the terms — and only when a specific product's own instructions support their use for this task.
FAQ
How do you cut peel-and-stick tile around an outlet?
Turn off the power, remove the cover plate, measure the opening and mark it on the tile, then score and cut with a utility knife and straightedge (tin snips for metal). Dry-fit, stick the tile up to the box, and reinstall the plate over the cut edge.
Do I need a box extender for a tile backsplash?
Maybe. Under NEC 314.20 a box on a tile/drywall (non-combustible) surface can be set back no more than ¼ inch. If the added tile leaves the box recessed further, you need a listed box extender. Thin spacers only move the receptacle forward, not the box.
Is it safe to just tile over and put the plate back?
Only if the outlet still sits flush and the box isn't recessed beyond code. Otherwise add spacers or a box extender. Always cut the power first and, if the wires are too short to work with, call an electrician.
What tool cuts peel-and-stick tile around outlets?
A sharp utility knife against a straightedge for vinyl tile; tin snips or a Dremel with a metal-cutting wheel for metal tile.
Sources
Research-first: manufacturer guides cover the cutting/tiling; the electrical-code points (NEC 314.20, spacers vs box extenders) come from labeled secondary and code sources.
- Smart Tiles — Panel installation guide (turn power off; unscrew the wall plate; add a spacer behind the outlet; reattach plate so it covers the panel edge). thesmarttiles.com
- Aspect — Metal tile installation ("turn the power off at your fuse box before performing any work near an outlet"; metal is conductive; tin snips / Dremel for cutouts). aspectideas.com
- Yipscazo — How to cut backsplash tile (measure width/height/distance; mark the outlet shape; score with a utility knife; dry-fit before removing backing). yipscazotile.com
- Family Handyman — Electrical box extenders — secondary (confirm dead with a tester; tile is a common reason to add an extender; recessed box + combustible material = fire risk; install sequence; call a pro if wires are short). familyhandyman.com
- NEC 314.20 (ECM/licensing explainers) — Code — box set back ≤ ¼ in. from a non-combustible finished surface; flush/proud on combustible. ecmweb.com / electricallicenserenewal.com
- Sonic Electric — NEC 314.20 explainer — secondary (recessed boxes allow arcing outside the enclosure, heat buildup, wiring stress). sonicelectric.com
Manufacturers under-cover the electrical side (only Smart Tiles mentions a spacer; none mentions a box extender), so the code guidance is sourced separately and labeled. Sources last reviewed: August 2026.